In my previous article I talked about Unity and Visual Studio: using Visual Studio to edit and maintain your Unity code. In that article I talked about working with source code directly in your Unity project.
DLLs are another way to get code into your Unity project. I'm talking about C# code that has been compiled and packaged as a .NET assembly.
The simplest way of working is to store source code directly in your Unity project. However, using DLLs gives you an alternative that has its own benefits. To be sure, it adds complication to your process so you must carefully weigh your options before jumping all the way in.
In this article I'll explain the benefits that will make you want to use DLLs. Then I'll cover the problems that will make you regret that decision. Finally I'll show you how to get the best of both worlds: using source code where it makes sense and using DLLs where they make sense. I'll show you how to compile a DLL yourself and bring it into your Unity project.
Table of Contents generated with DocToc
- The Basics
- Why use source code instead of DLLs?
- Why use DLLs?
- DLLs: not so good for prototyping and exploratory-coding
- The best of both worlds!
- Compiling a DLL to use in Unity
- Referencing the Unity DLLs
- Conclusion
The Basics
The starting point for this article, is the understanding that a DLL can simply be dropped into your Unity project, Unity will detect it and you can then start using it. Of course, it's almost never that simple in real scenarios, however I will demonstrate that it can be that simple. In a future article I'll give you some tools to help solve the issues that will inevitably come up.
Say you have a compiled DLL. You may have compiled it yourself, got it from a mate, got it from the Asset Store or somewhere else, it doesn't matter. You can copy the DLL into your Unity project and (presuming it actually works with Unity) start using it. Of course, any number of problems can and do happen. Especially if you don't know where the DLL came from, what it does or what its dependencies are. These problems can be very difficult to solve and I'll come back to that in the future.
If you have started programming with Unity, the way source code is included in the project and automatically compiled will seem normal. In the traditional .NET programming world in the time before Unity, exes and DLLs (both being .NET assemblies) are the normal method for packaging your code and distributing it as an application.
It's only with Unity that the rules have been changed: Unity automatically compiles code that is included in the Unity project. This is the default way of working with Unity, and is what you learn when introduced to programming through Unity.
Note however that DLLs do get created, it's just that they are created for you (possibly without you even realizing it). Go and check if you like, take a Unity build and search for DLLs in the data directory. You can see for yourself that Unity automatically compiles your code to DLLs. This leads us to the understanding that we can copy pre-compiled DLLs into the project and Unity will recognize them. Indeed we can make use of DLLs that have been created for us by other developers. You have probably even done this already. Many of the packages for sale on the Unity Asset Store include DLLs rather than source code. Also available to us are many .NET libraries that can be installed through nuget (at least the ones that work with Mono/Unity). More about nuget in my next article.
Why use source code instead of DLLs?
I'm going to make arguments for and against using DLLs with Unity. In this line of work there are no perfect answers, we must do our best given our understanding and knowledge at the time and aim to make the right tradeoffs at the right times. I've heard it said that there are no right decisions, only less worse decisions. We need to think critically about technology to judge one approach against another.
I start here by expounding the benefits of simply using source code with Unity and I'll offer a warning against using DLLs. Using DLLs will add complexity and overhead to your game development project. Complexity can mount over time and it can kill your project. That's how serious this is. You are gambling with the future of your project, trying to choose better techniques and technology and hoping the benefits will outweigh the costs. So it's not lightly that I'm going to tell you to add complexity to your project. Additional complexity must bring tangible benefits that outweigh the cost of that complexity.
So my first advice is... don't use DLLs until you are convinced that they will benefit you. I'll attempt to convince you of the benefit of DLLs in the next section, but if you are uncertain or not ready to commit, then your best bet is to stick with source code. This is the way it works by default with Unity. It's simple and works with very low overhead. Visual Studio integrates directly and you can use it easily for editing and debugging your code.
Why use DLLs?
Ok, I probably just convinced you to use source code over DLLS. Now I must show you there are real benefits to working with DLLs.
- DLLs are an efficient, natural and convenient mechanism for packaging code for sharing with other people and other projects. This already happens extensively, you see many DLLs sold via the Unity Asset Store and nuget is literally full of DLLs to download for free. Github is full of code-libraries that you can easily compile to DLLs to include in your project. Even if you aren't selling your code on the asset store, you still might find it useful to package your code in DLLs for easy sharing between your own (or your friend's) projects. You can even share code between Unity and non-Unity projects. This might be important for you, for example, if you are building a stand-alone dedicated server for your game. This will allow you to share code between your game (a Unity application) and your server (a standard .NET application).
- Using DLLs hides the source code. This is useful when you are distributing your code but don't want to give away the source. Note that it is nearly impossible to completely protect your code when working with Unity (and generally with .NET). Anyone with sufficient technical skills can decompile your DLLs and recover at least partial source code. Obfuscating your code can help a great deal and make decompilation more difficult, but it's just not possible to completely protect again this.
- Using DLLs allows you to bake a code release. You might have tested a code release and signed-off on it. When the code release is baked to a DLL you can be sure that the code can't be modified or tampered with after the DLL is created. This may or may not be important to you. It is very important if you aim to embrace the practices of continuous integration and/or continuous delivery. I'd like to address both of these practices in future articles.
- Building your code to DLLs enables you to use any of the commonly available .NET unit testing frameworks (we use xUnit.net). These frameworks were built to work with DLLs. Why? Remember that DLLs (and exes) are the default method of delivering code in the .NET world. I'll talk more about automated testing and TDD for game development in a future article.
DLLs: not so good for prototyping and exploratory-coding
Here is another pitfall of using DLLs that is worth considering. They will slow down your feedback loop.
Compiling a DLL from source code and copying it to your Unity project takes time. Unity must reload the updated DLL, which also takes time. This is slow compared to having source code directly in the Unity project, which takes almost zero time to update and be ready to run.
Increased turnaround time in the game dev process can and will cause problems that can derail your project. When developing games we must often do prototyping or exploratory-coding, this is all a part of the iterative process of figuring out the game we are developing and finding the fun. When coding in this mode, we must minimize turnaround-time and reduce the cycle time in our feedback loop.
Using DLLs increases turn-around time. The effect is minimized by automated development infrastructure (another thing to talk about in a future article) and having a super-fast PC. The effect can also be reduced by test-driven-development, a technique that is enabled by DLLs and has the potential to drastically reduce your cycle time. TDD however is an advanced skill (despite what some people say) and must be used with care (or it will cause problems for you). So that leaves us in the position that DLLs are not great for rapid evolution of game-play code. DLLs are likely to slow you down and are best used for code that has already stabilized and that has stopped changing regularly.
The best of both worlds!
Fortunately, should we need to use DLLs, we can get the best of both worlds. Source code and DLLs can be combined in the same project:
- Fast-moving and evolving game-play code should be stored as source code in the Unity project.
- The rock solid and stable code (eg core-technology code) that we share from project to project can be stored in DLLs.
As code modules transition from fast-moving to stable we can move them as necessary from source code to DLLs.
Compiling a DLL to use in Unity
Now I'll show you how to create a DLL for use in Unity. Getting real-world DLLs to work in Unity can be fraught with problems. In this section I'll demonstrate that you can easily create and use a DLL with no problems, what could possibly go wrong?
There are many tutorials and getting started guides for Visual Studio and I don't need to replicate those. I'm only going to cover the basics of making a DLL and then being able to use it in Unity.
I'll start with this... making a DLL for Unity in Visual Studio is basically the same as making any DLL in Visual Studio, with just a few small issues that I'll cover here. So any tutorial that shows you how to make DLLs in Visual Studio is going to work... just pay attention to the caveats I mention here, or they could catch you out!
I talked about how to download and install Visual Studio in the last article. So I'll assume that you are ready to follow along.
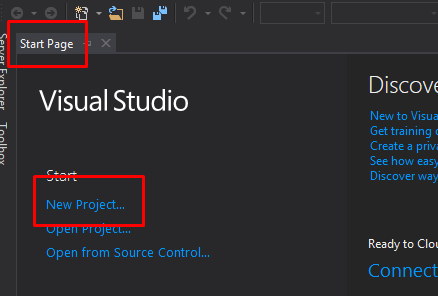
We first need to create a project for our DLL. When we start Visual Studio we should be at the start page. Click on New Project...
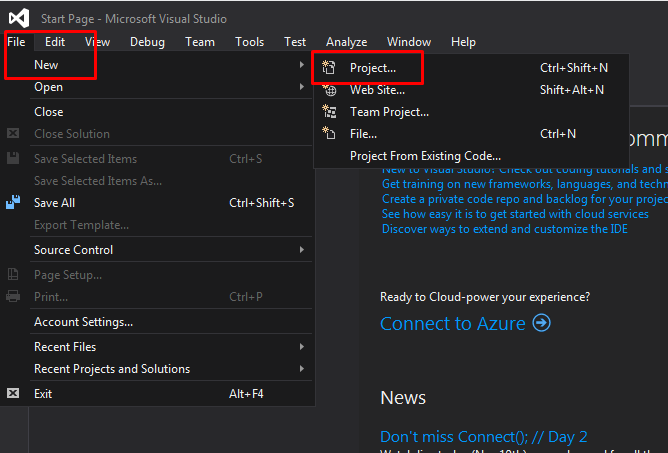
You can also create a project from the File menu. Click New then Project...
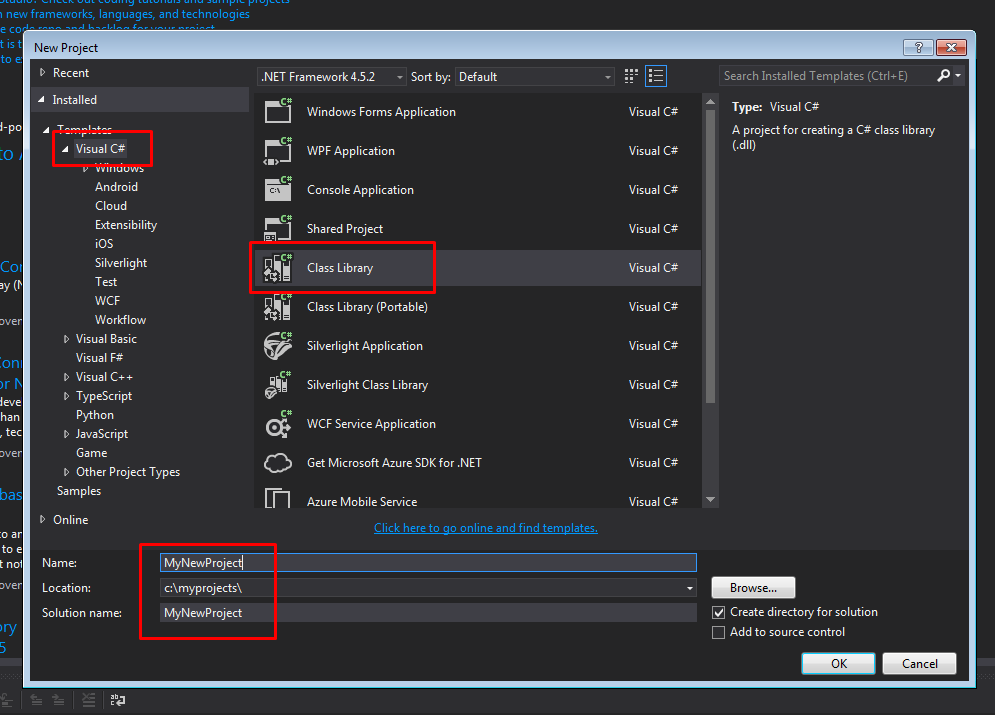
Now you will see the New Project window. Here you can select the type, name and location of the project. You'll notice the many types of projects. For Unity we want to create a Class Library.
Here you could also choose a project type for a stand-alone application. For example Console Application for a command line exe. If you require a GUI application then use Windows Forms Application or WPF Application. Any of these choices might be appropriate for building a stand-alone dedicated server that is independent of Unity.
After selecting a name and location for your project now click OK to create the solution and the project (see the previous article for more on solutions and projects).
You have now created a project that looks something like this:
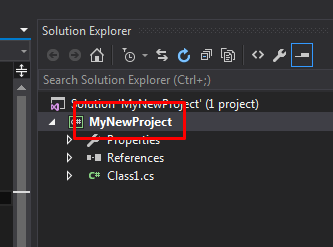
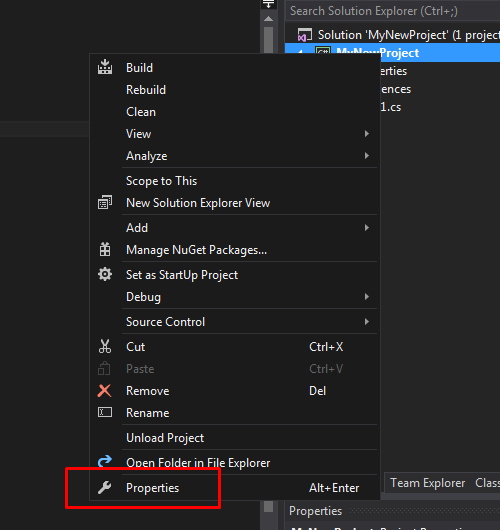
We now need to edit the project's Properties to ensure that the DLL will run under Unity.
In the Solution Explorer right-click on the project and click Properties:
You should be looking at the project properties now. You'll see that by Target framework default is set to the latest version of .NET. At the time of writing this is .NET Framework 4.5.2.
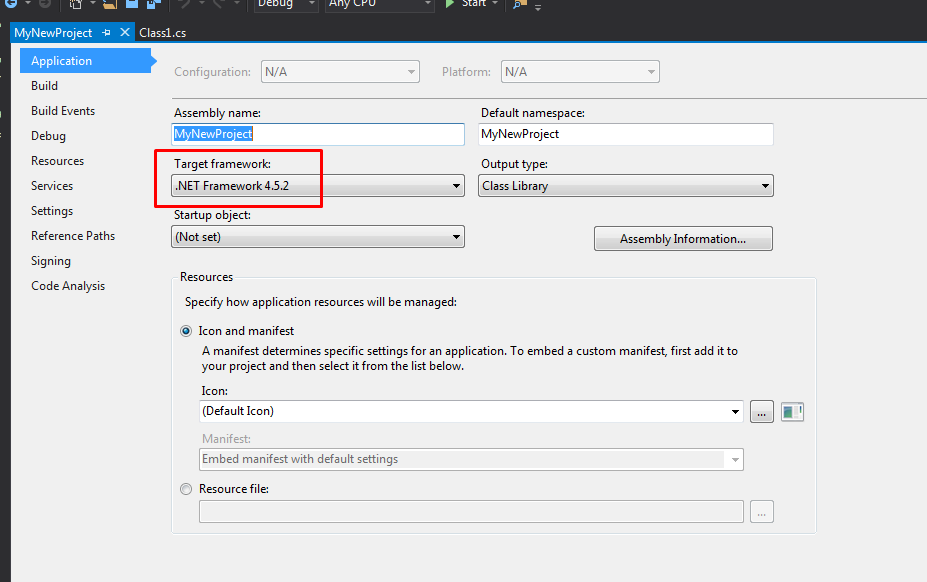
We need to change Target framework to .NET Framework 3.5 for our DLL to be usable under Unity.
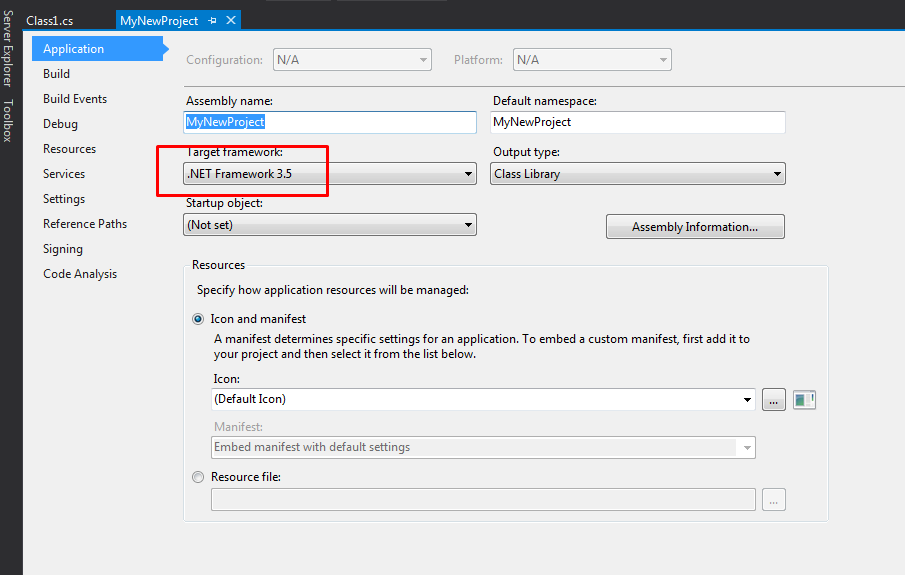
Why did we have to change to .NET 3.5? I'm glad you asked.
The Unity scripting engine is built from an ancient version of Mono. Mono is the open source equivalent of the .NET Framework. When working with Unity we are limited to .NET 3.5. This might not seem so bad until you realize that .NET 3.5 is 8 years old! We are missing out on all the new features in .NET 4 and 4.5. Unity is keeping us in the digital dark ages!
As a side note you may have heard the (not so recent) news that the .NET Framework itself is now open source. This is certainly great news and will hopefully help Unity get it's act together and bring their .NET support up-to-date.
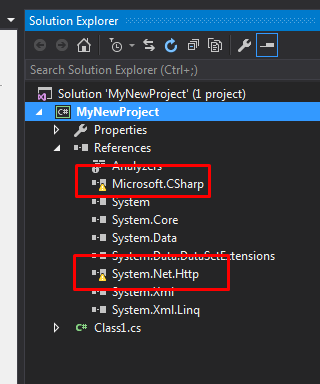
Switching to .NET 3.5 causes some of the .NET 4.5 references to go bad. You will have to manually remove these references:
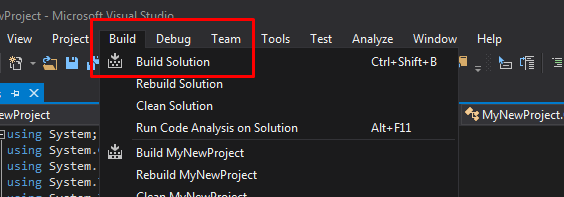
Now you are ready to build the DLL. From the Build menu click Build Solution or use the default hotkey Ctrl+Shift+B.
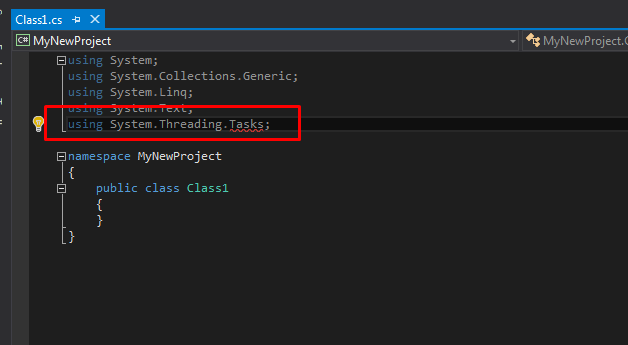
At this stage you may get a compile error due to switching .NET frameworks. In new projects, Visual Studio automatically creates a stub Class. The generated file imports the System.Threading.Tasks namespace, and this doesn't exist under .NET 3.5. You must either remove the offending using directive or delete the entire file (if you don't need the stub Class).
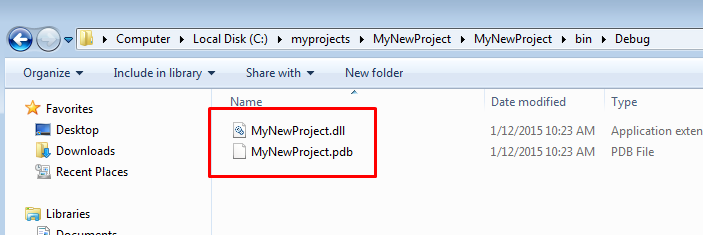
Build again and you should be able to see the generated DLL in the project's bin/Debug directory.
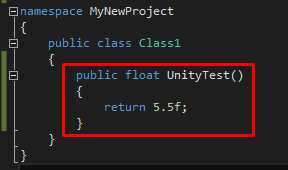
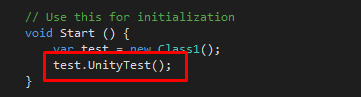
Now we are almost ready to test the DLL under Unity. First though we really need a class to test. For this example I'll add a function to the generated stub class so it looks as follows. I've added the UnityTest function which returns the floating-point value 5.5.
Now rebuild the DLL and copy it over to the Unity project. The DLL must go somewhere under the Assets directory. You probably don't want to put everything in the root directory of your project, so please organize it in sub-directory of your choosing. Make sure you copy the pdb file over as well. You'll need this later for debugging (which I'll cover in another article).
Now you can use classes and functions from your DLL in your Unity scripts. Unity automatically generates a reference to your DLL when you copy it to the Assets directory.
When you attempt to use your new class there will likely be an error because the namespace hasn't been imported.
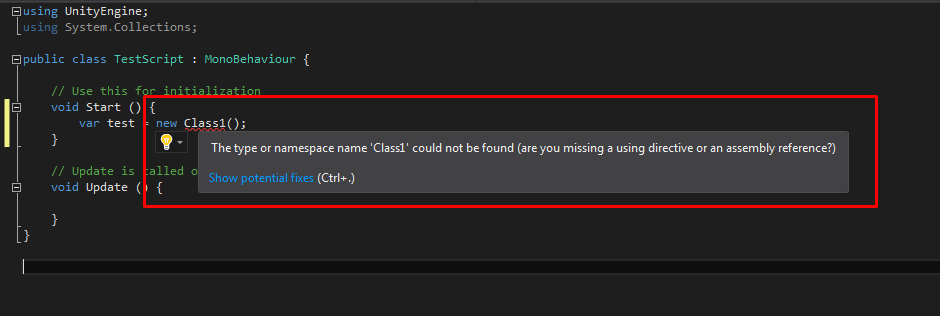
This is easily rectified using Quick Actions (available in Visual Studio 2015). Right-click on the error (where the red squiggly line is). Click Quick Actions.... Alternately you can use the default hotkey Ctrl+.
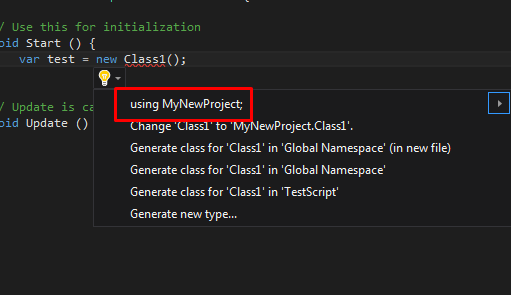
This brings up the Quick Actions menu. Select the menu item that adds the using directive for you, in this example select using MyNewProject;.
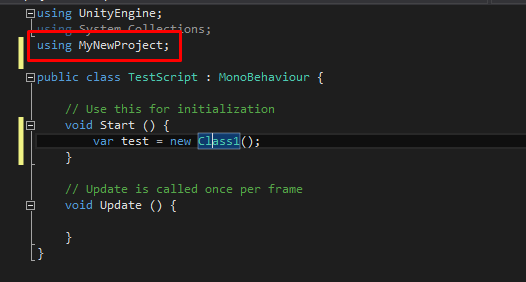
Visual Studio has added the using directive and fixed the error. The red squiggly line is gone.
Now we have created an instance of our class and can call the UnityTest function on it. Typing the name of the object and then . (period) allows intellisense to kick in and list the available options.
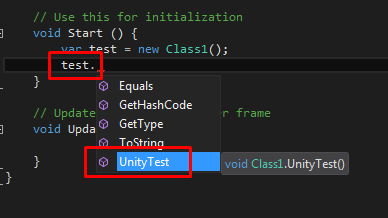
There is only the UnityTest function here that we currently care about. So select that and Visual Studio will autocomplete the line of code for you.
Let's modify the code slightly to print out the value returned by UnityTest. This will allow us to verify that our code is working as expected.
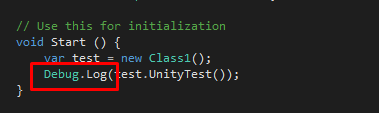
Now we should start Unity and test that this works. When we run this we expect the output 5.5 to appear in the Unity Console. It's a good practice, while coding, to predict the result of running your code. This makes the development process slightly more scientific and it helps to improve your skill as a developer. Programming can be complex and it is often hard to predict the outcomes, if anyone disagrees with that statement you should ask them why their code still has bugs? Improving our predictive skills is one of the best ways to gradually improve our general ability to understand what code is doing.
To test your code you need a scene with a GameObject that has the test script attached. I've talked about this in the previous article so I won't cover it again here.
With the scene setup for testing, click Play in Unity and then take a look at the Console.
If working as expected you'll see something like this in the Console:
5.5
UnityEngine.Debug:Log(Object)
TestScript:Start() (at Assets/TestScript.cs:10)
Referencing the Unity DLLs
The first DLL we created is not dependent on Unity. It doesn't reference the Unity DLL at all. I wanted to start this way to demonstrate that this is possible. That we can create a DLL that is independent of Unity and that can be used in other applications. An example of which, as already mentioned, is a stand-alone dedicated server app. Another example might be a command line helper app. The important take-away is that the DLL can be shared between Unity and non-Unity applications.
However you will most likely want to create DLLs that are designed to work in Unity and that do reference the Unity DLL. So let's cover that now.
We'll upgrade our example DLL to depend on Unity. We'll add a MonoBehavior script to the DLL that we can use in Unity.
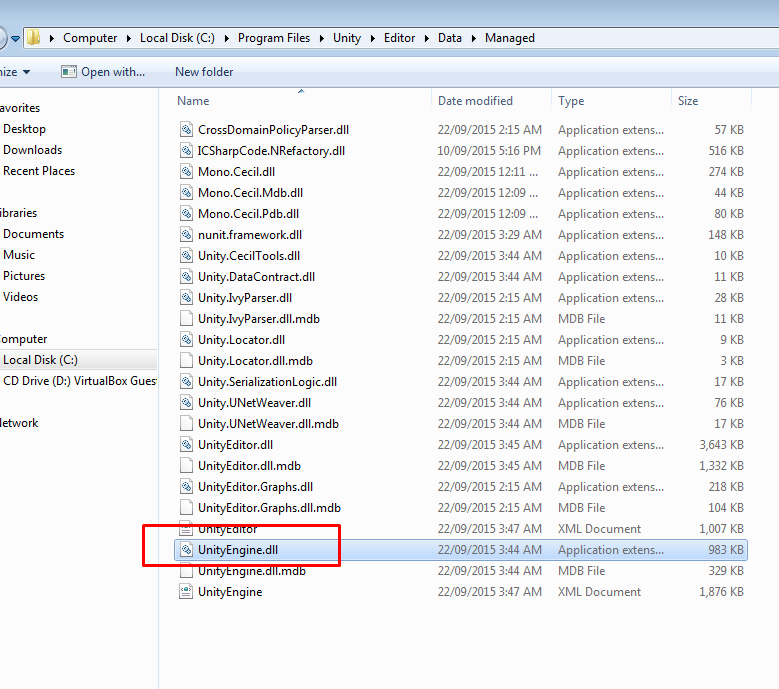
The first thing we need to do is add a reference to the Unity DLL. To do this you must copy the DLL from your Unity installation to the project that will reference it. To find the DLL go into your local Unity installation (for me that is C:\Program Files\Unity) and navigate to the sub-directory Editor\Data\Managed. Here you will find UnityEngine.dll.
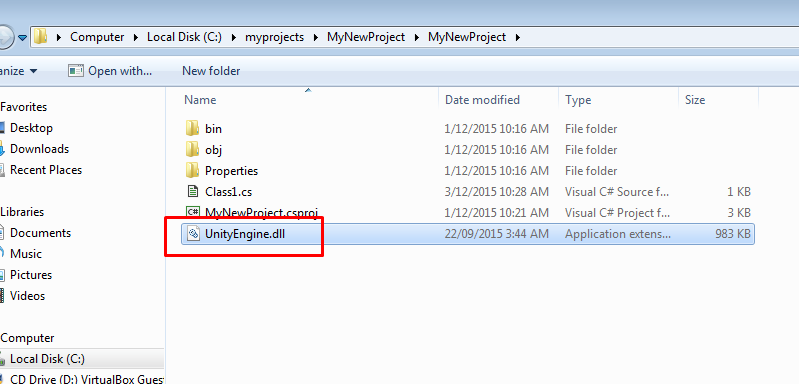
Copy the DLL into the folder containing your Visual Studio project.
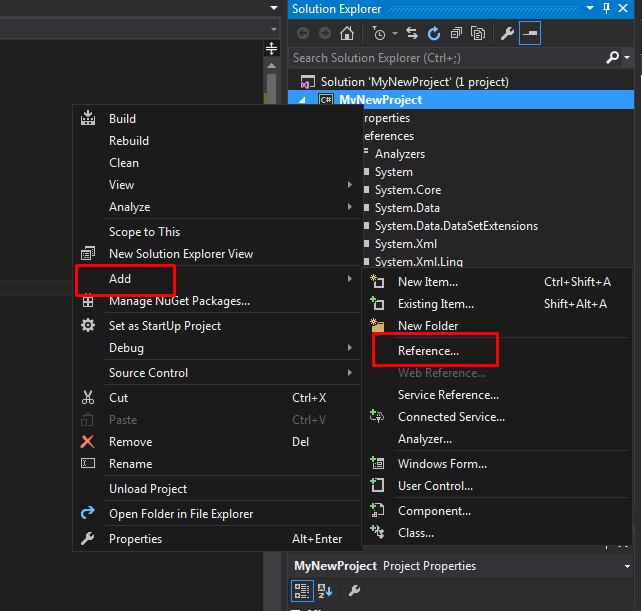
Switch back to the Visual Studio Solution Explorer. Right-click on your project, click Add, then click Reference....
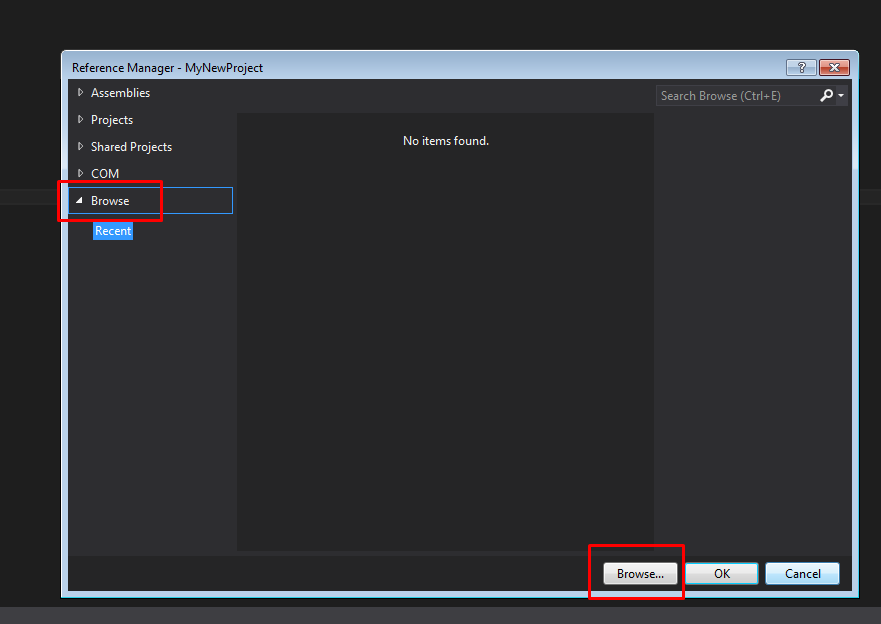
In the Reference Manager window select Browse, then click the Browse... button.
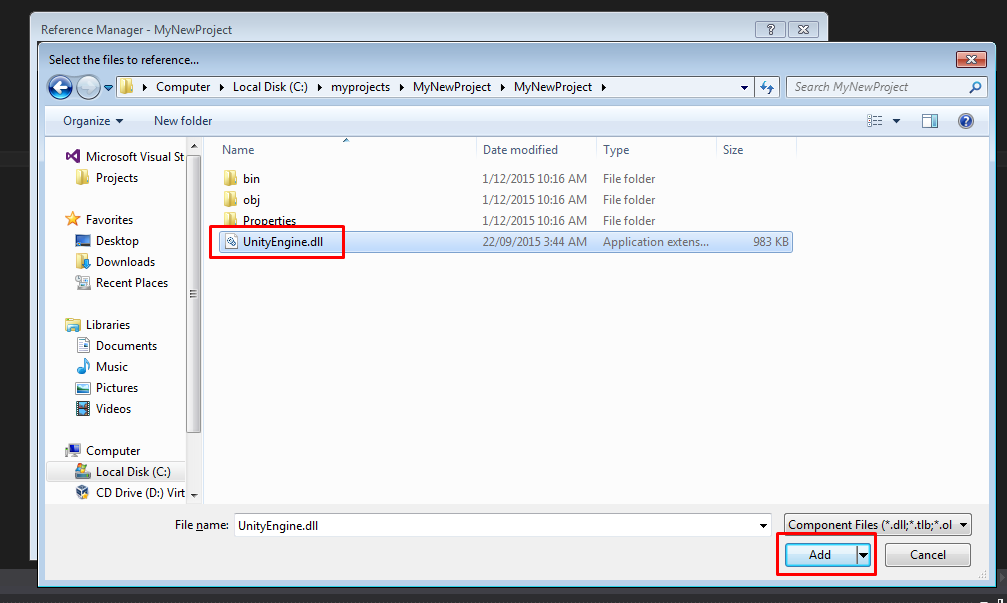
Navigate to the Visual Studio project directory and select UnityEngine.dll. Then click Add:
Back in the Reference Manager, click OK.
You should now see a reference to UnityEngine from your project:

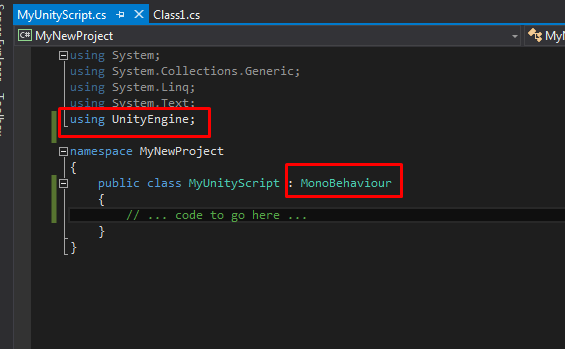
Now you can add a MonoBehaviour class to your dll:
After you copy the DLL to your Unity project you can attach the new component to GameObjects in the hierarchy.
Conclusion
In this article I've summarized the benefits and pitfalls of using DLLs with Unity. I've shown how to compile and use your own DLL and how to bring it into your Unity project.
You now have an understanding of the the reasons you might want to use DLLs and you have the tools to start using them.
If you do a lot of prototyping or exploratory coding, where a tight feedback loop works best, then source code is your best bet and DLLs may not be a good choice. Quick and streamlined prototyping is one of Unity's benefits. Using DLLs, whilst it can be a good practice, can detract from efficient prototyping, something that is so very important in game development.
In the end, if DLLs are important to you, you may have to mix and match source code and DLLs. Using DLLs where they make sense, where the benefits outweigh the added complexity. Using source code when you need to move fast. Make your own calls and find a balance that works for your project.
As a last word... The reasons why DLLs are difficult to use is mainly down to Unity: the out-of-date .NET version combined with terrible error messages (when things go wrong). We should all put pressure on Unity to get this situation improved!
In future articles I'll be talking about nuget and troubleshooting DLL-related issues.
Thanks for reading.